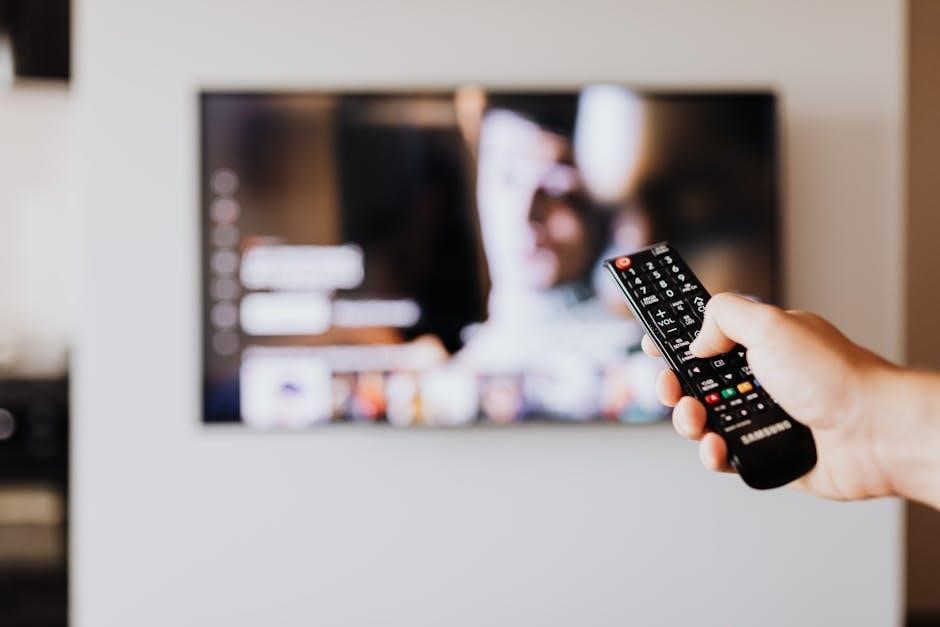
The GE Universal Remote Control offers a convenient solution for controlling multiple devices, including TVs, DVDs, and audio systems, with an intuitive design and user-friendly interface.
1.1 Overview of the Remote Control and Its Features
The GE Universal Remote Control is designed to simplify home entertainment by consolidating control of multiple devices into one convenient unit. Compatible with leading brands, it supports TVs, DVD players, audio systems, and more. The remote features an intuitive layout with buttons for common functions like power, volume, and channel navigation. Advanced models include backlit keys for easier use in low-light environments. With its user-friendly design, the remote ensures seamless operation across devices, eliminating the need for multiple controllers. Its versatile functionality and compatibility make it an essential tool for modern home theaters.
1.2 Compatibility with Various Devices
The GE Universal Remote Control is engineered to work seamlessly with a wide range of electronic devices from leading manufacturers. It supports popular brands of TVs, DVD players, audio systems, and cable boxes. The remote’s compatibility extends to satellite receivers, DVRs, and streaming devices, ensuring comprehensive control over your home entertainment system. By utilizing pre-programmed codes, users can easily pair the remote with their devices. This universal compatibility eliminates the clutter of multiple remotes, offering a streamlined experience for managing all your entertainment needs from a single device. The remote’s adaptability ensures it remains a versatile tool for diverse home setups.
1.3 Importance of the Instruction Manual
The instruction manual is an essential resource for maximizing the functionality of the GE Universal Remote Control. It provides detailed guidance on initial setup, programming, and troubleshooting, ensuring a seamless user experience. The manual outlines step-by-step instructions for pairing the remote with various devices, entering codes, and customizing settings. Additionally, it includes advanced features like setting up master volume control and adjusting the sleep timer. By referring to the manual, users can resolve common issues quickly and optimize their remote’s performance. It also serves as a reference for understanding button functions and updating firmware. The manual is a comprehensive guide that helps users unlock the full potential of their GE Universal Remote Control, making it an indispensable tool for both new and experienced users.

Setting Up the Remote Control
Setting up the GE Universal Remote Control involves unboxing, installing batteries, and completing basic first-time configuration for seamless device connectivity and functionality.
2.1 Unboxing and Initial Preparation

Upon unboxing the GE Universal Remote Control, carefully inspect the device for any damage. The package typically includes the remote, batteries, and an instruction manual. Before use, ensure the remote is clean and free from debris. Gently wipe the surface with a soft cloth if necessary. Familiarize yourself with the button layout and functions by reviewing the manual. This step helps in understanding the remote’s features and preparing it for setup. Next, insert the provided batteries, ensuring proper alignment of the positive and negative terminals. Avoid using mixed or old batteries to maintain optimal performance. Once powered, the remote is ready for initial configuration, enabling you to control your devices efficiently. Proper preparation ensures a smooth setup process and enhances user experience.
2.2 Installing Batteries
Installing batteries in the GE Universal Remote Control is a straightforward process. Locate the battery compartment, typically found on the back or bottom of the remote; Open it by sliding or flipping the cover, depending on the model. Insert the required number of batteries, ensuring the positive (+) and negative (-) terminals align correctly. Use new, high-quality batteries for optimal performance. Avoid mixing old and new batteries or using different types, as this may reduce functionality. Once the batteries are securely in place, close the compartment tightly. Properly installed batteries ensure reliable operation and prevent issues during setup. Dispose of old batteries responsibly. With the batteries in place, the remote is ready for further configuration and use.
2.3 Basic Setup for First-Time Use
After installing the batteries, begin by turning on the device you want to control. Press and release the device button (e.g., TV, DVD) on the remote to select the correct mode. Next, locate the appropriate codes for your device from the manual or online database. Press and hold the SETUP button until the red light turns on, then release it. Enter the code using the number pad, and press ENTER. The red light will blink to confirm the code is accepted. Repeat this process for additional devices if your remote supports multiple-device control. Once programmed, test the remote by adjusting settings like volume or channel to ensure proper functionality. Refer to the manual for troubleshooting if issues arise during setup. This process ensures seamless integration with your devices.

Programming the Remote Control
Program your GE universal remote using device codes or the code search feature. Press and hold SETUP, enter the code, and test functionality to ensure proper device control.
3.1 Using Remote Codes for Device Setup
Using remote codes is a straightforward method to program your GE universal remote. Start by identifying the correct codes for your device, which can be found in the instruction manual or online. Once you have the code, press and hold the SETUP button until the red light turns on. Release the button, then enter the code using the number pad. The red light will blink twice if the code is entered correctly. Test the remote to ensure all functions work properly. If the code doesn’t work, repeat the process with an alternate code. This method ensures quick and efficient setup for controlling your devices seamlessly.
3.2 Manual Code Entry Process
The manual code entry process allows you to program your GE universal remote by entering specific codes for your devices. Start by pressing and holding the SETUP button until the red light turns on. Release the button, then press the device button for the type of device you want to control (e.g., TV, DVD). Enter the 3- or 4-digit code using the number pad. The red light will blink twice if the code is accepted. Test the remote to ensure it controls your device. If it doesn’t work, repeat the process with a different code. This method is ideal when you have a list of codes for your device brand. Ensure the codes are entered correctly for proper functionality.

3.4 Using the Code Search Feature
The code search feature on the GE universal remote allows you to automatically find the correct code for your device. Press and hold the SETUP button until the red light turns on, then release it. Press the button for the device you want to control (e.g., TV, DVD). Enter 9-9-1 using the number pad. The red light will blink twice. Point the remote at your device and press the POWER button. The remote will test codes until your device turns off or responds. When it works, press ENTER to save the code. If no code is found, the red light will blink twice, and the process will exit. This feature is convenient when specific codes are unavailable.

Customizing the Remote Control
Customize your GE universal remote to enhance functionality. Assign frequently used buttons, set up master volume control, and adjust the sleep timer for personalized convenience.
4.1 Understanding Button Functions
The GE Universal Remote Control features a variety of buttons designed for specific functions, such as power, volume, and navigation. Each button corresponds to a particular action, making it essential to understand their roles for optimal use. The remote includes dedicated buttons for devices like TV, DVR, and DVD, as well as function buttons like Mute and directional navigation. The Power button turns devices on or off, while the Volume and Mute buttons control audio settings. Additionally, the remote offers customizable options, allowing users to assign frequently used functions to specific buttons. This feature enhances convenience and personalizes the remote to individual preferences. By familiarizing yourself with the button layout and functions, you can efficiently manage all your connected devices.
4.2 Setting Up Master Volume Control
The Master Volume Control feature on the GE Universal Remote allows you to assign volume buttons to a specific device, such as a soundbar or audio receiver, ensuring consistent volume adjustment across your setup; To enable this feature, press and hold the SETUP button until the red light on the remote turns on, then release it. Next, press the device button corresponding to the device you wish to control (e.g., CBL or DVD). Finally, press the ENTER or SELECT button to save your settings. This setup ensures that the volume buttons will always control the selected device, providing a seamless experience. The red light will indicate successful programming, and you can test the volume buttons to confirm functionality.
4.3 Adjusting the Sleep Timer
The GE Universal Remote Control allows you to set a sleep timer, enabling your devices to turn off automatically after a specified period. To adjust the sleep timer, press the MENU button on the remote to access the settings. Navigate to the “Sleep Timer” option using the arrow keys and select it by pressing OK or ENTER. Choose the desired duration from the available options, which typically range from 15 to 120 minutes. Once selected, save your settings by pressing the appropriate button, usually EXIT or RETURN. The remote will confirm the setting with an LED light flash. This feature ensures your devices turn off automatically, saving energy and providing convenience. You can test the timer by leaving the device on and observing if it turns off after the set duration.

Troubleshooting Common Issues
Troubleshooting common issues with the GE Universal Remote Control involves resolving code entry problems, fixing connectivity issues, and resetting the remote if necessary. Refer to the manual for detailed solutions.
5.1 Resolving Code Entry Problems
When encountering code entry issues, ensure the correct codes for your device are used. Press the SETUP button until the red light turns on, then release it. Enter the code using the numeric keypad. If the light blinks twice, the code was entered incorrectly; try again. Verify the code list for your specific device brand. If issues persist, use the CODE SEARCH feature to automatically find the correct code. Ensure batteries are fresh and the remote is within range of the device. If problems continue, reset the remote by pressing SETUP and holding it until the red light turns off, then release. This clears stored settings, allowing you to re-program the remote.
5.2 Fixing Connectivity Issues
To resolve connectivity problems with your GE universal remote, ensure the remote has a clear line of sight to the device. Check that batteries are fresh and properly installed. If the remote is not responding, reprogram it using the correct codes for your device. Press the SETUP button, enter the code, and test functionality. If issues persist, use the CODE SEARCH feature to find the correct code automatically. Ensure no obstacles block the infrared signal; Resetting the remote by pressing and holding the SETUP button until the red light turns off can also resolve connectivity problems. If the issue remains, update the remote’s firmware or consult the user manual for advanced troubleshooting steps.
5.3 Resetting the Remote Control
To reset the GE universal remote control, press and hold the SETUP button until the red light turns on. Release the button, then press and hold it again until the red light turns off. This resets the remote to its factory settings, clearing all programmed codes. After resetting, reprogram the remote by entering the correct codes for your devices. Ensure the remote is in the correct device mode before reprogramming. If the remote still does not function properly, check the batteries or consult the user manual for further instructions. Resetting is a useful troubleshooting step when the remote fails to respond or when switching to a new device configuration.
Advanced Features and Tips
The GE universal remote offers advanced features like multi-device control, custom button functions, and firmware updates. Use the master volume feature for seamless audio control across devices. Update firmware regularly for improved performance and compatibility with smart devices. Explore these features to enhance your remote experience.
6.1 Controlling Multiple Devices
The GE Universal Remote Control simplifies managing multiple devices, allowing seamless operation of up to four different audio/video devices. It supports TVs, DVD players, soundbars, and more, eliminating the need for multiple remotes. By programming the remote with specific codes for each device, users can easily switch between devices using dedicated buttons. The remote ensures intuitive control, with features like volume locking to maintain audio consistency across devices. This functionality enhances convenience, reducing clutter and streamlining home entertainment systems. Users can customize settings to optimize performance for each connected device, ensuring a tailored experience. The GE remote’s multi-device control capability is a standout feature, making it a versatile tool for modern home setups.
6.2 Updating the Remote Control Firmware
Updating the firmware of your GE Universal Remote Control ensures optimal performance and access to the latest features. To update, visit the official GE website and download the newest firmware version compatible with your remote model. Extract the downloaded file and transfer it to a USB drive. Insert the USB into the remote’s designated port, navigate to the settings menu, and select the firmware update option. Follow on-screen instructions to complete the process. Do not interrupt the update to avoid potential malfunctions. Once done, restart the remote to apply changes. Regular firmware updates enhance functionality and compatibility, ensuring your remote operates smoothly with all connected devices.
6.3 Using the Remote with Smart Devices
The GE Universal Remote Control is compatible with various smart devices, allowing seamless integration into your home entertainment system. Pair the remote with smart TVs, streaming devices like Roku or Chromecast, and sound systems for unified control. Ensure your smart devices are connected to the same network and follow the remote’s pairing instructions for each device.
For optimal performance, sync your remote settings with the smart device’s preferences, such as volume control or input selection. Refer to the remote’s manual for specific pairing codes and troubleshooting tips to ensure smooth operation across all smart devices.